Support Documentation
Welcome to SocialSchedulify's support page! This guide will help you navigate through the platform, from creating an account to utilizing key features.
Get StartedSign In & Sign Up
Welcome to SocialSchedulify! This guide will help you get started with creating an account and accessing your dashboard.
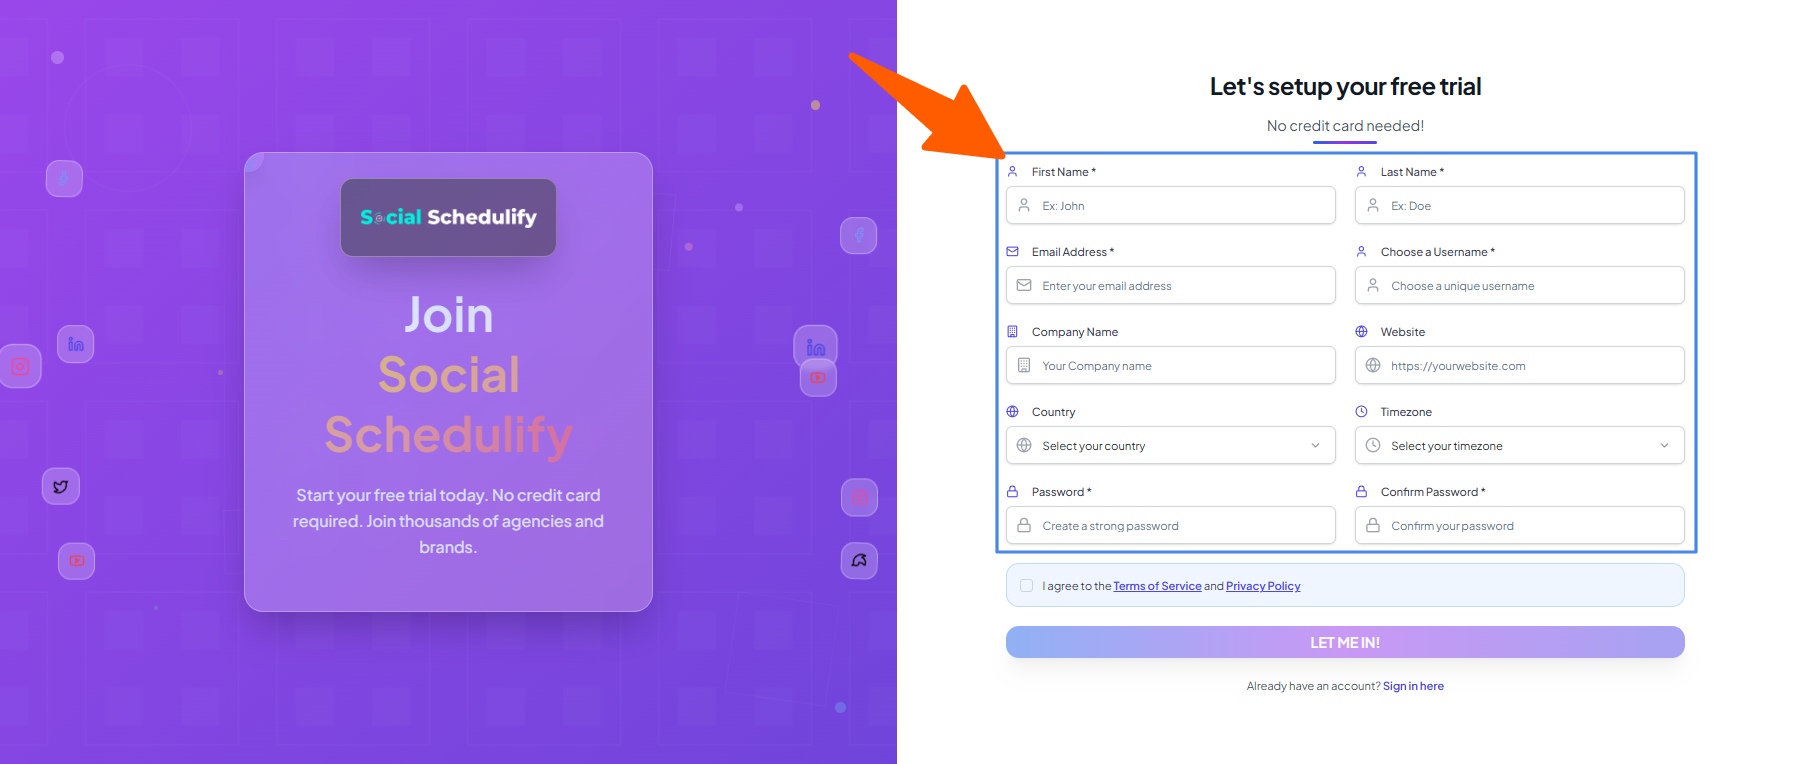
Sign Up
To create a new account:
- Go to the SignUp URL
- Fill in your details:
- First Name
- Last Name
- Email Address
- Username
- Company Name
- Website (optional)
- Country
- Timezone
- Password (and Confirm Password)
- Click the Register button.
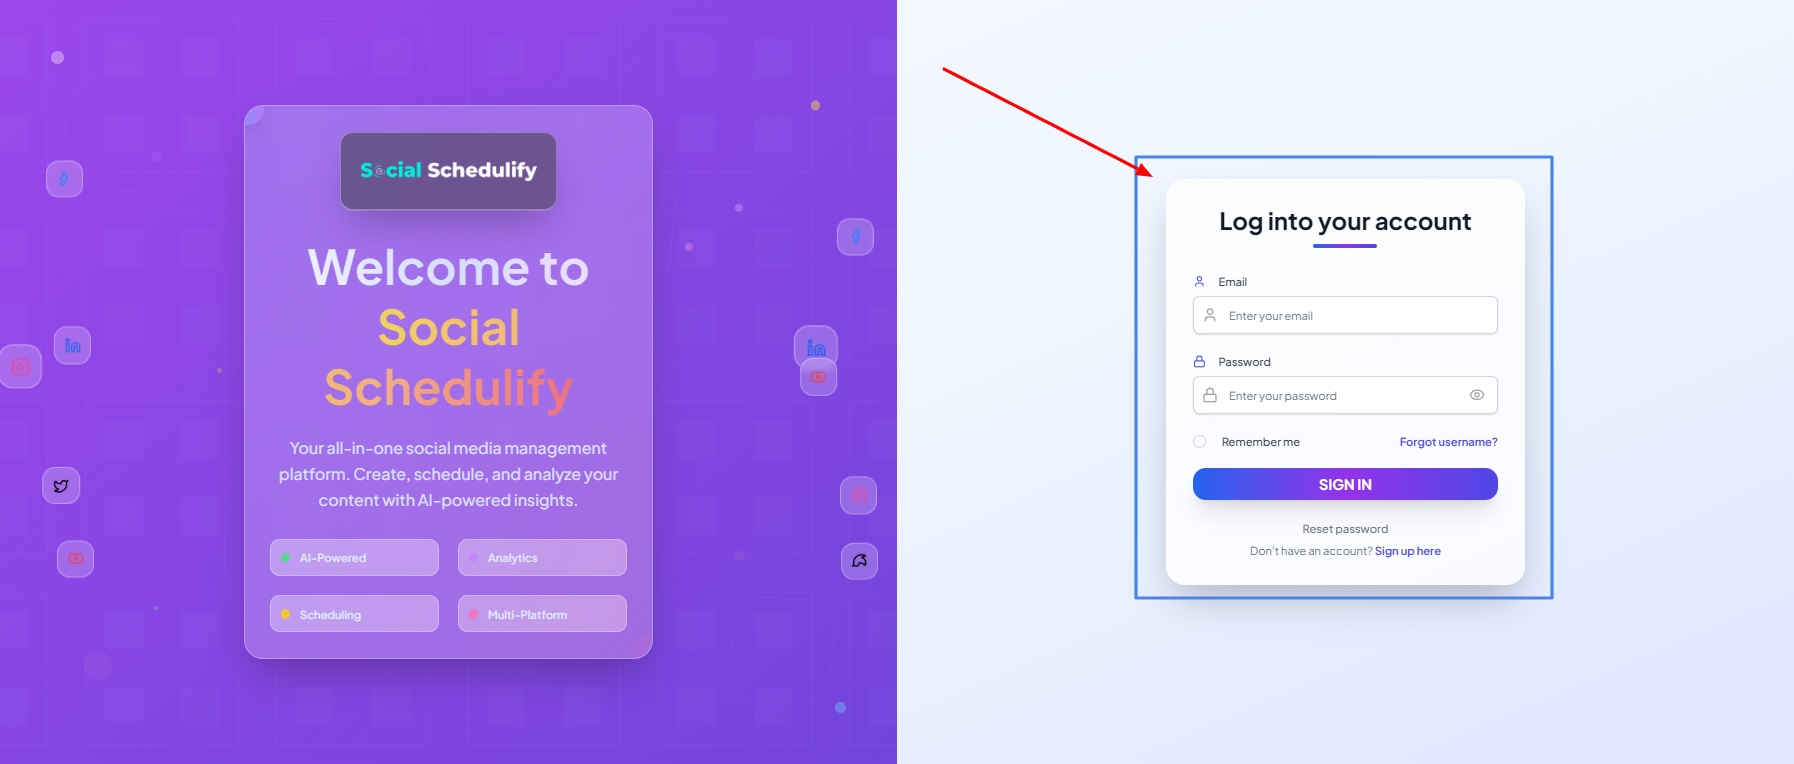
Sign In
To access your account:
- Go to the SignIn URL
- Enter your credentials and click Login.
Dashboard Overview
After logging in, you will be directed to the Dashboard where you can view all of your account's key features, including campaign analytics and account management tools.
Main Features
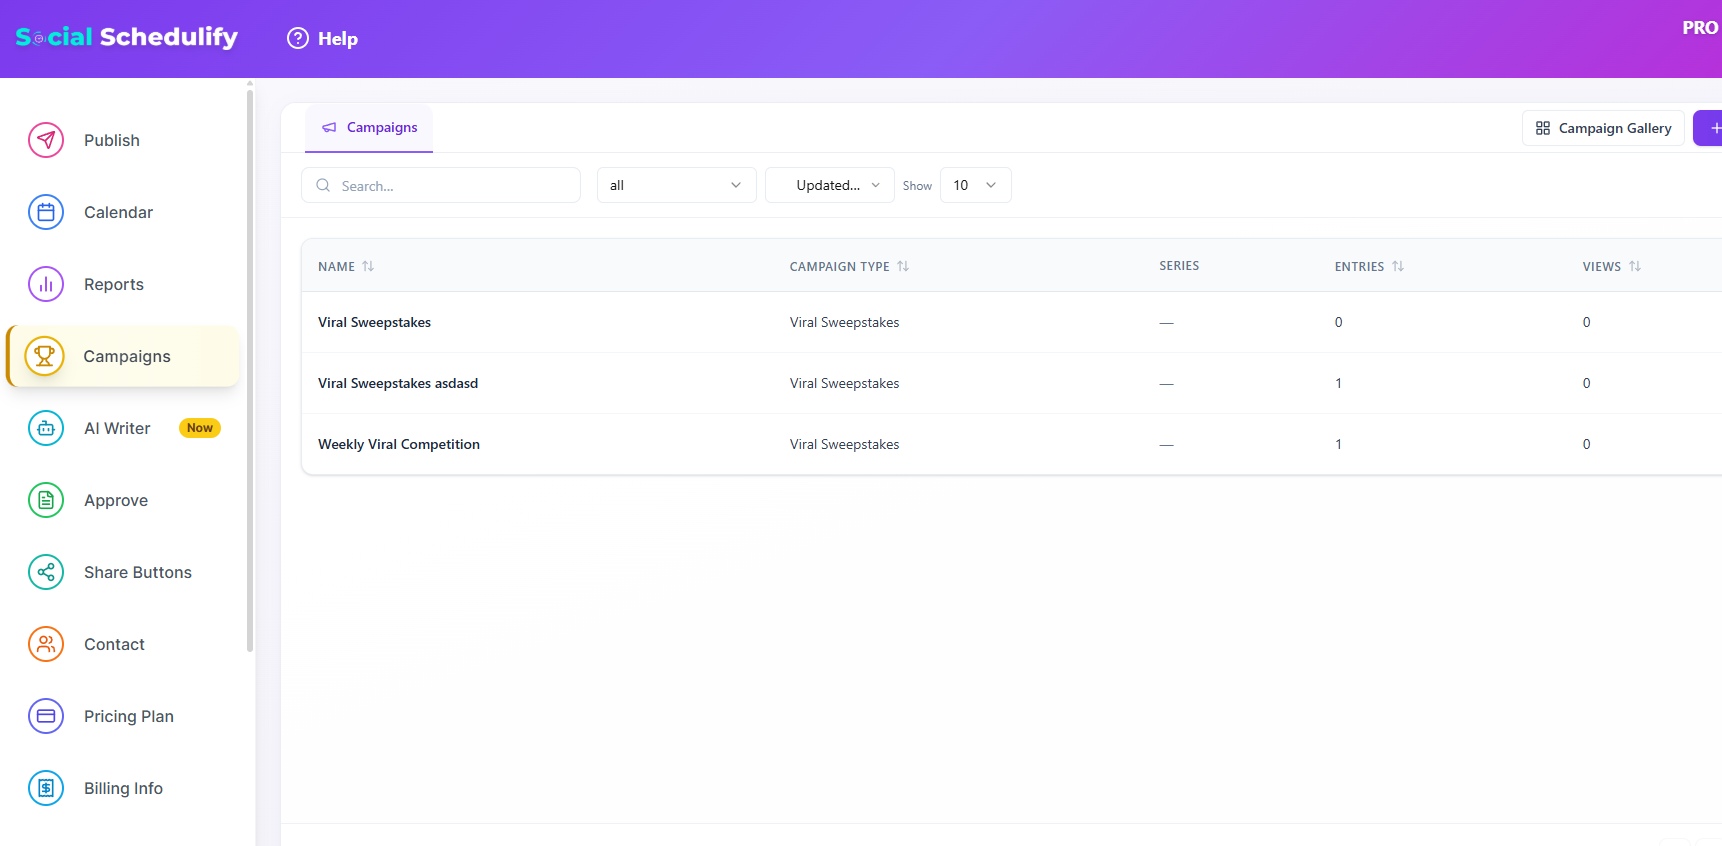
Campaign History
View all your social accounts' campaign history and related metrics.
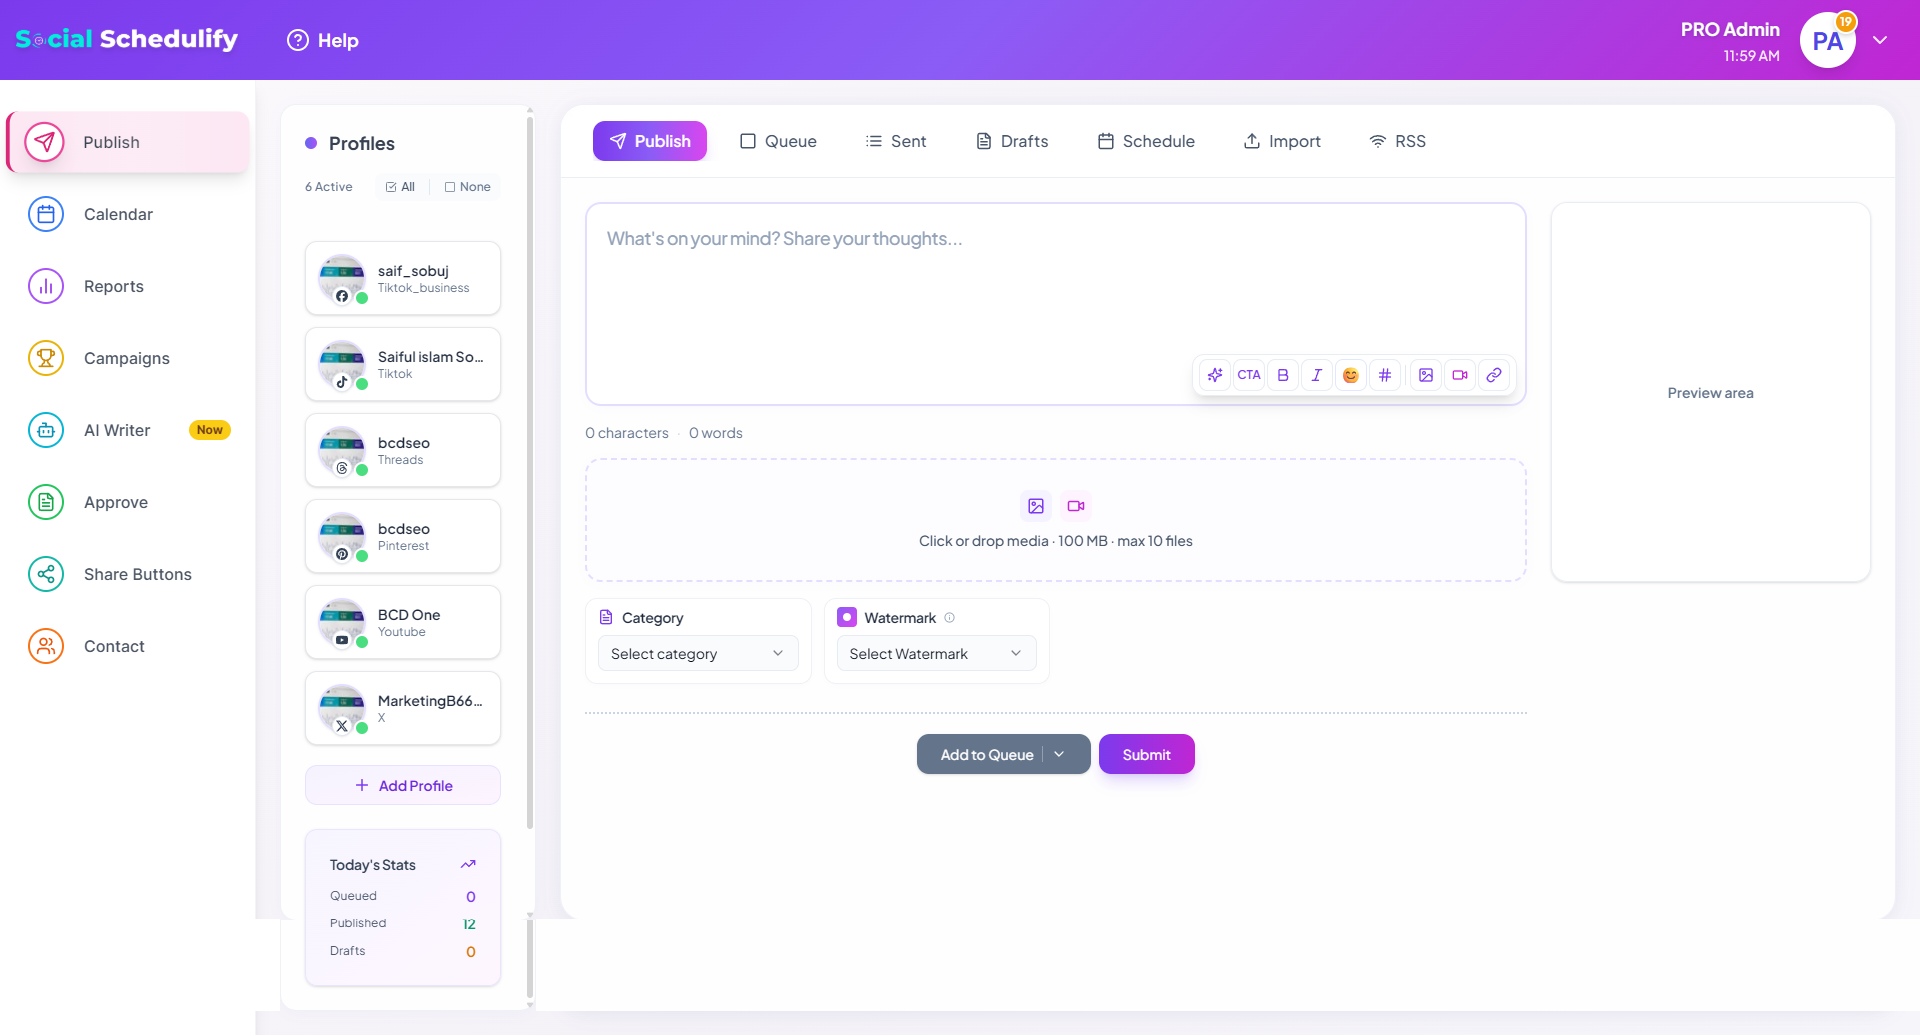
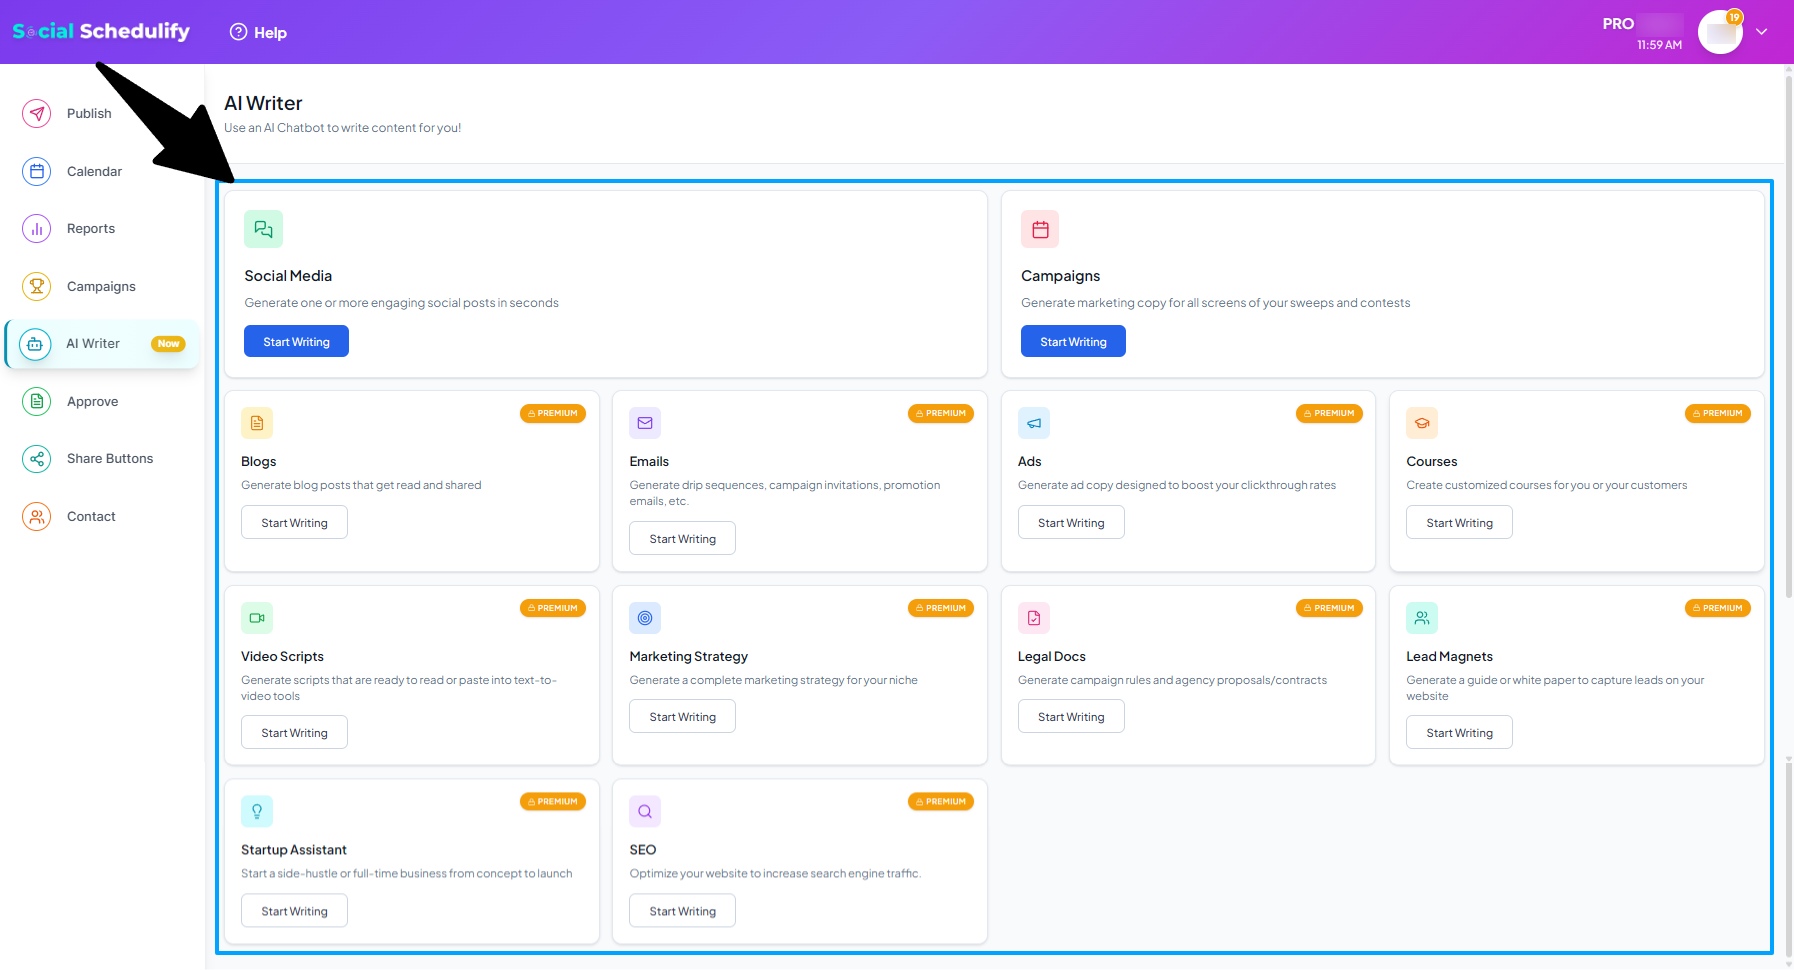
AI Writer Assistant
Use this tool for drafting social media posts for campaigns.
All Post Approval
This section allows you to approve or reject posts before they are shared across your platforms.
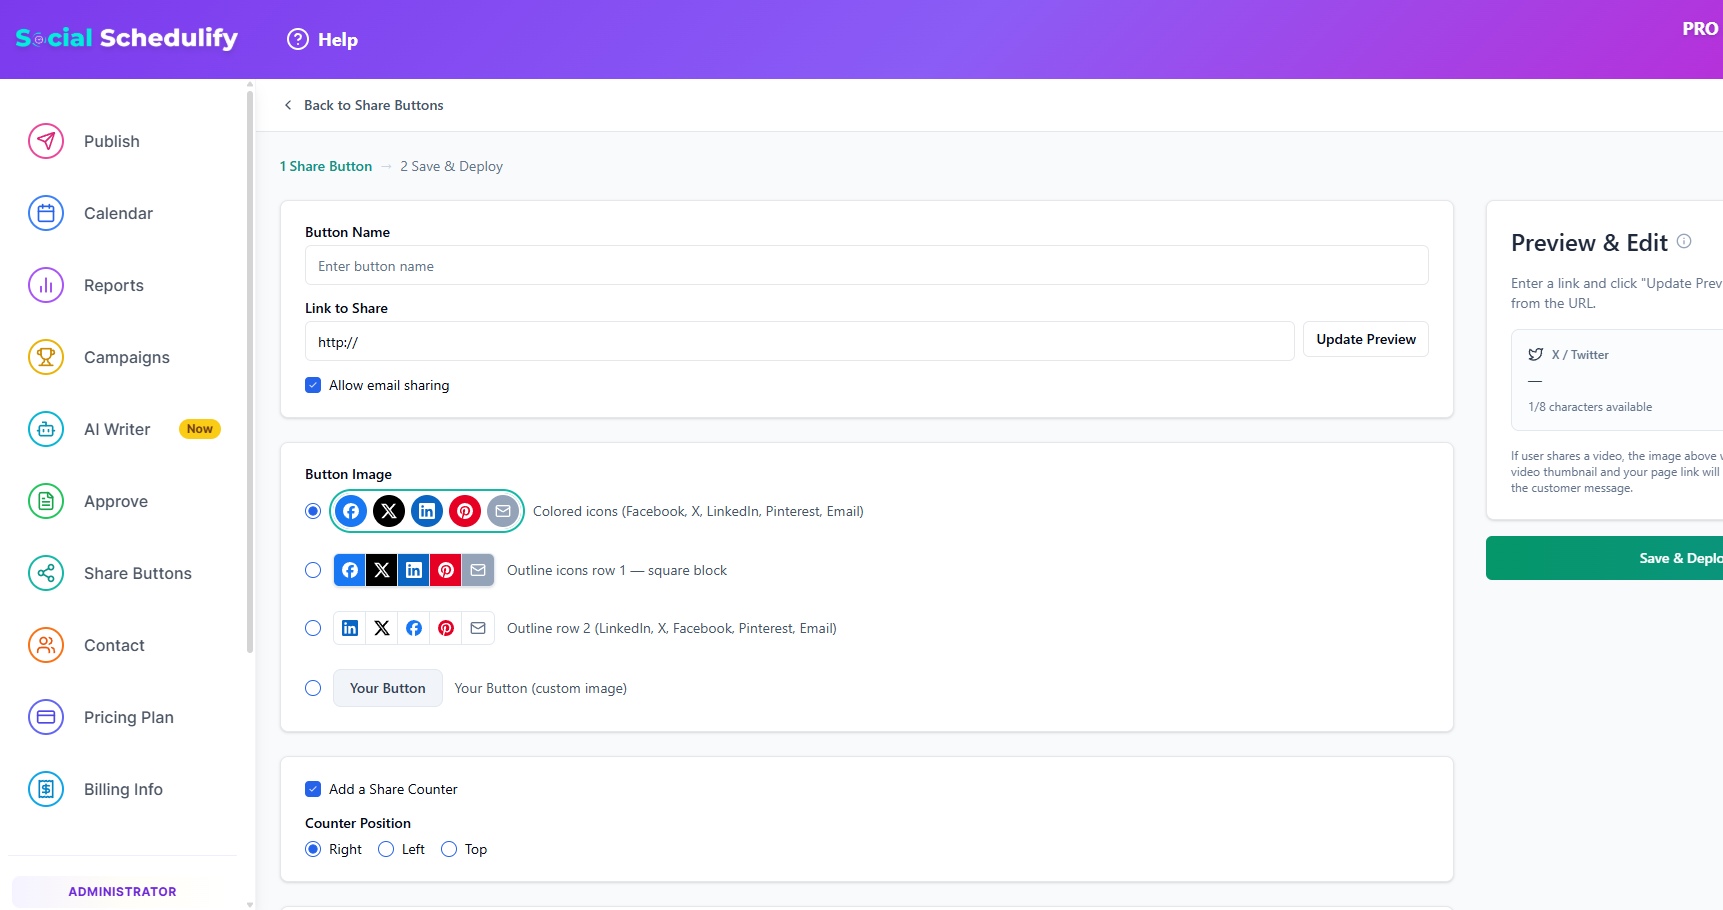
Share Buttons
Customize share buttons for each campaign across different social media.
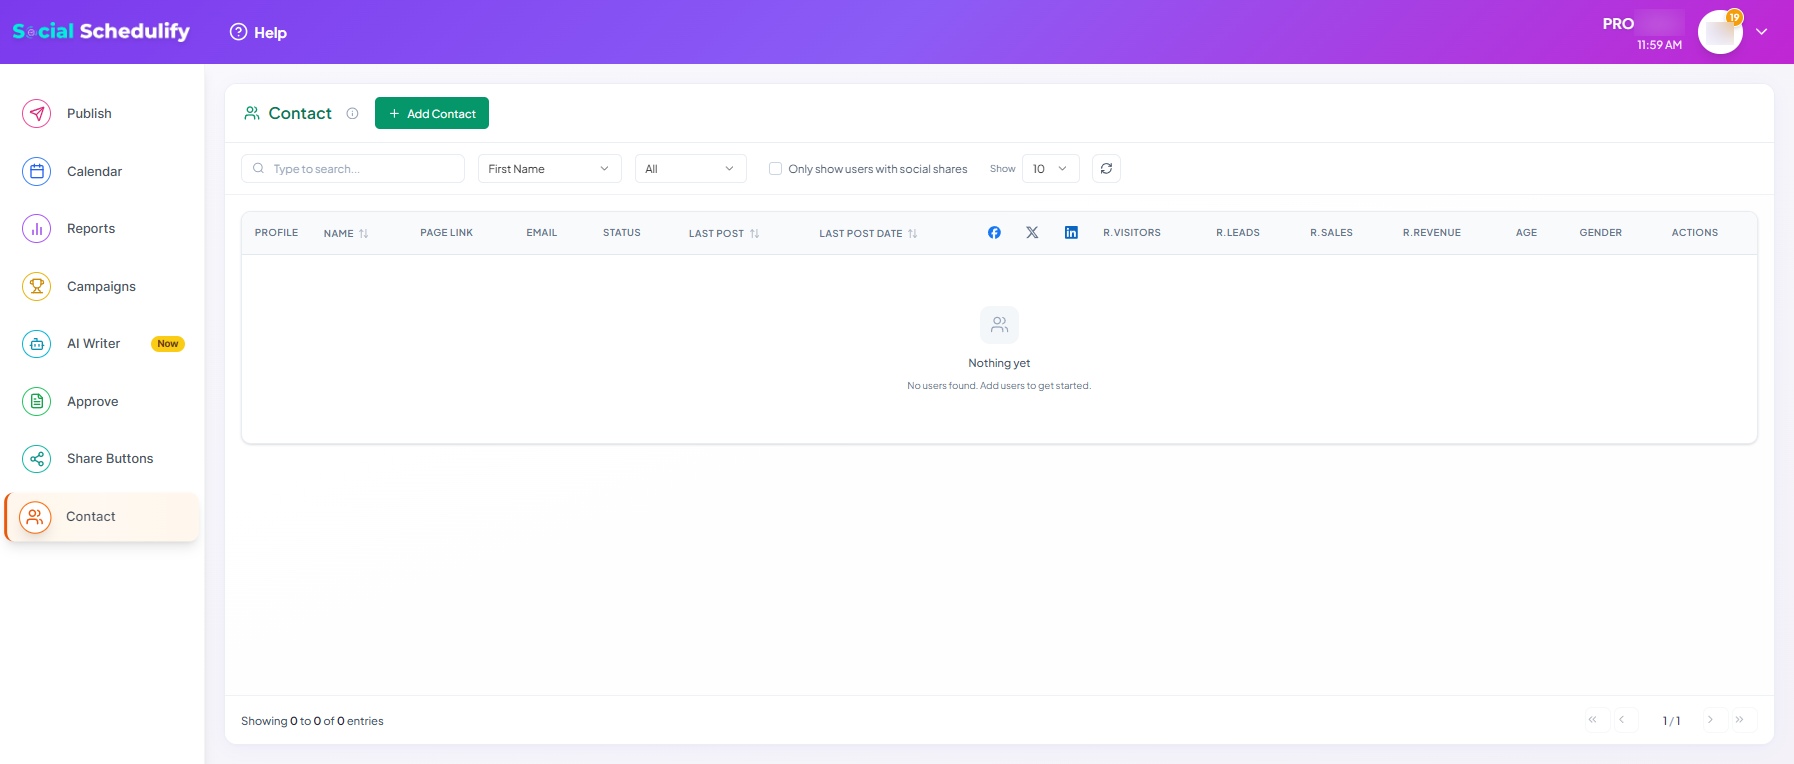
Saved Contacts
Store and manage contacts that you frequently engage with.
Managing Accounts and Settings
In this section, you'll learn how to manage connected social media accounts, set up notifications, and monitor your content.
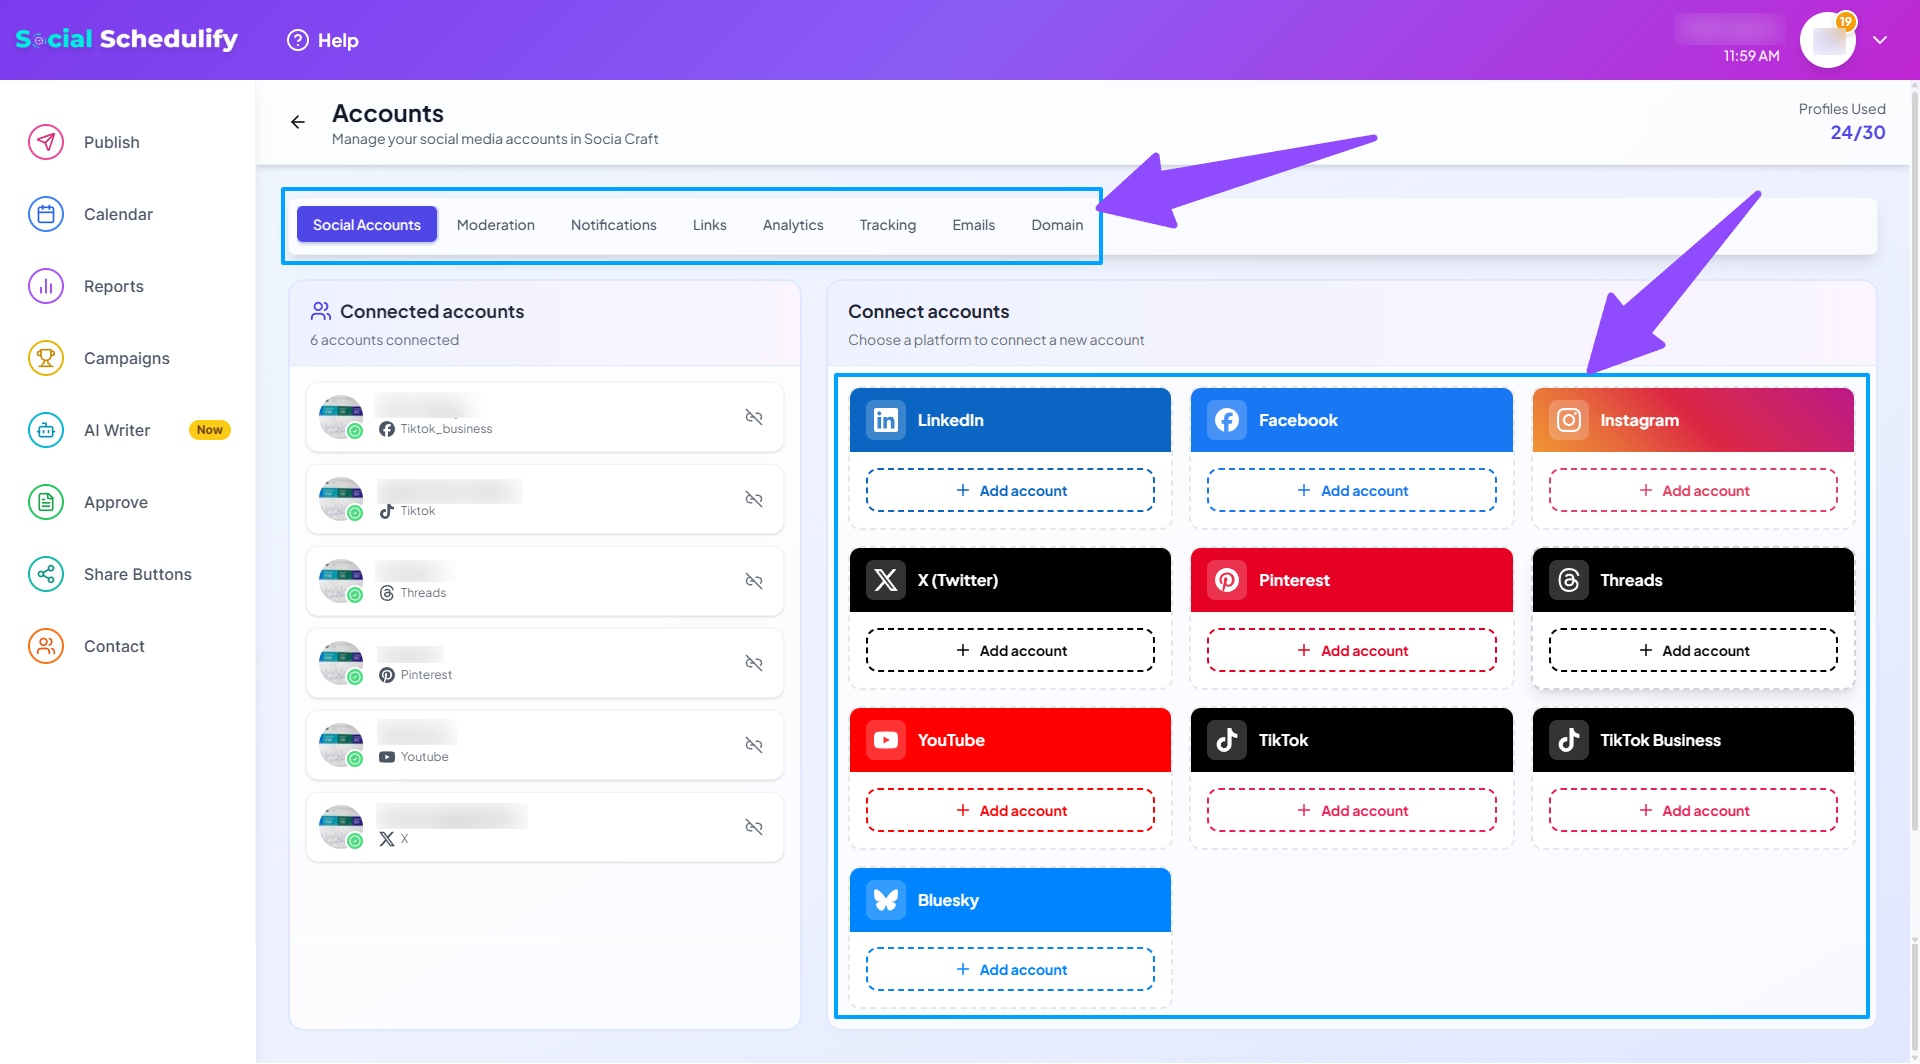
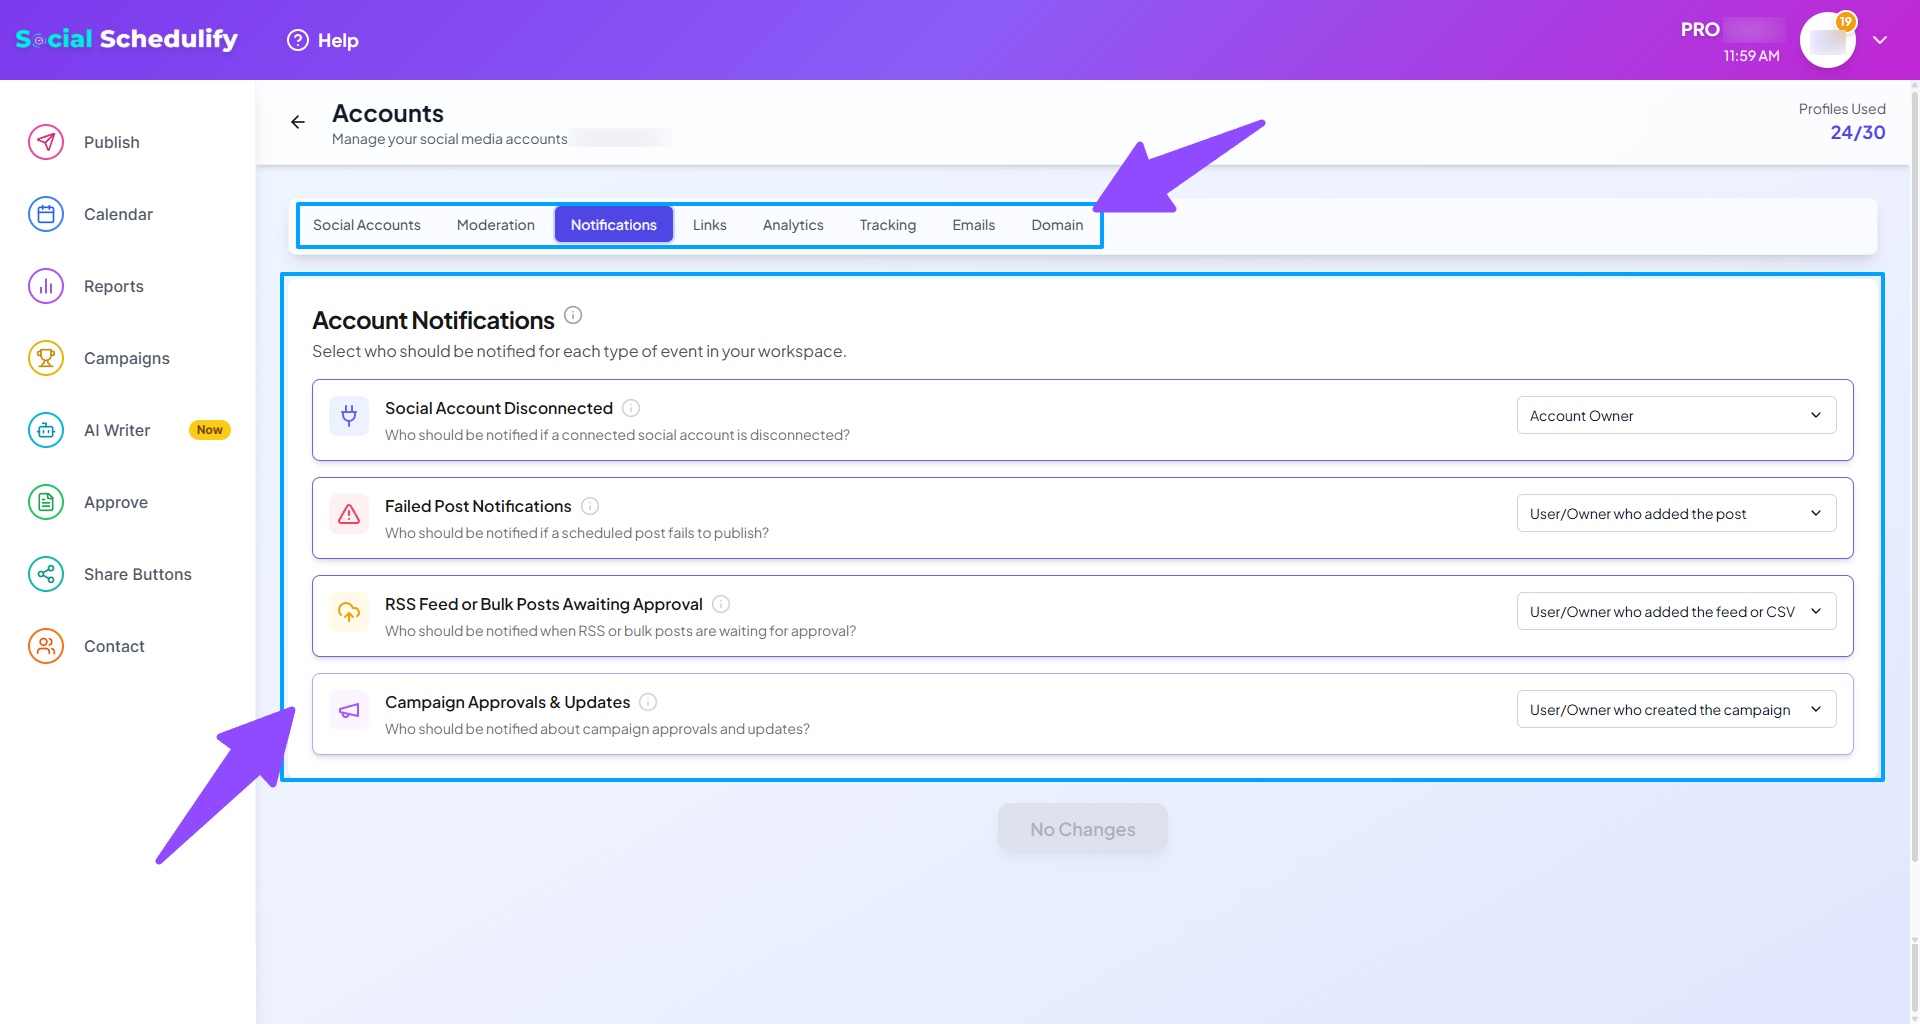
Accounts Tab
Here you can manage connected social media accounts and make changes as necessary.
Account Notifications
Set up notifications for account activities such as approval requests, campaign updates, etc.
Content Monitoring & Tracking
Monitor your campaigns and track their performance over time.
Campaign History and Analytics
In this section, view detailed analytics on the performance of each campaign, including engagement metrics and trends over time. This feature is useful for evaluating the effectiveness of your posts.
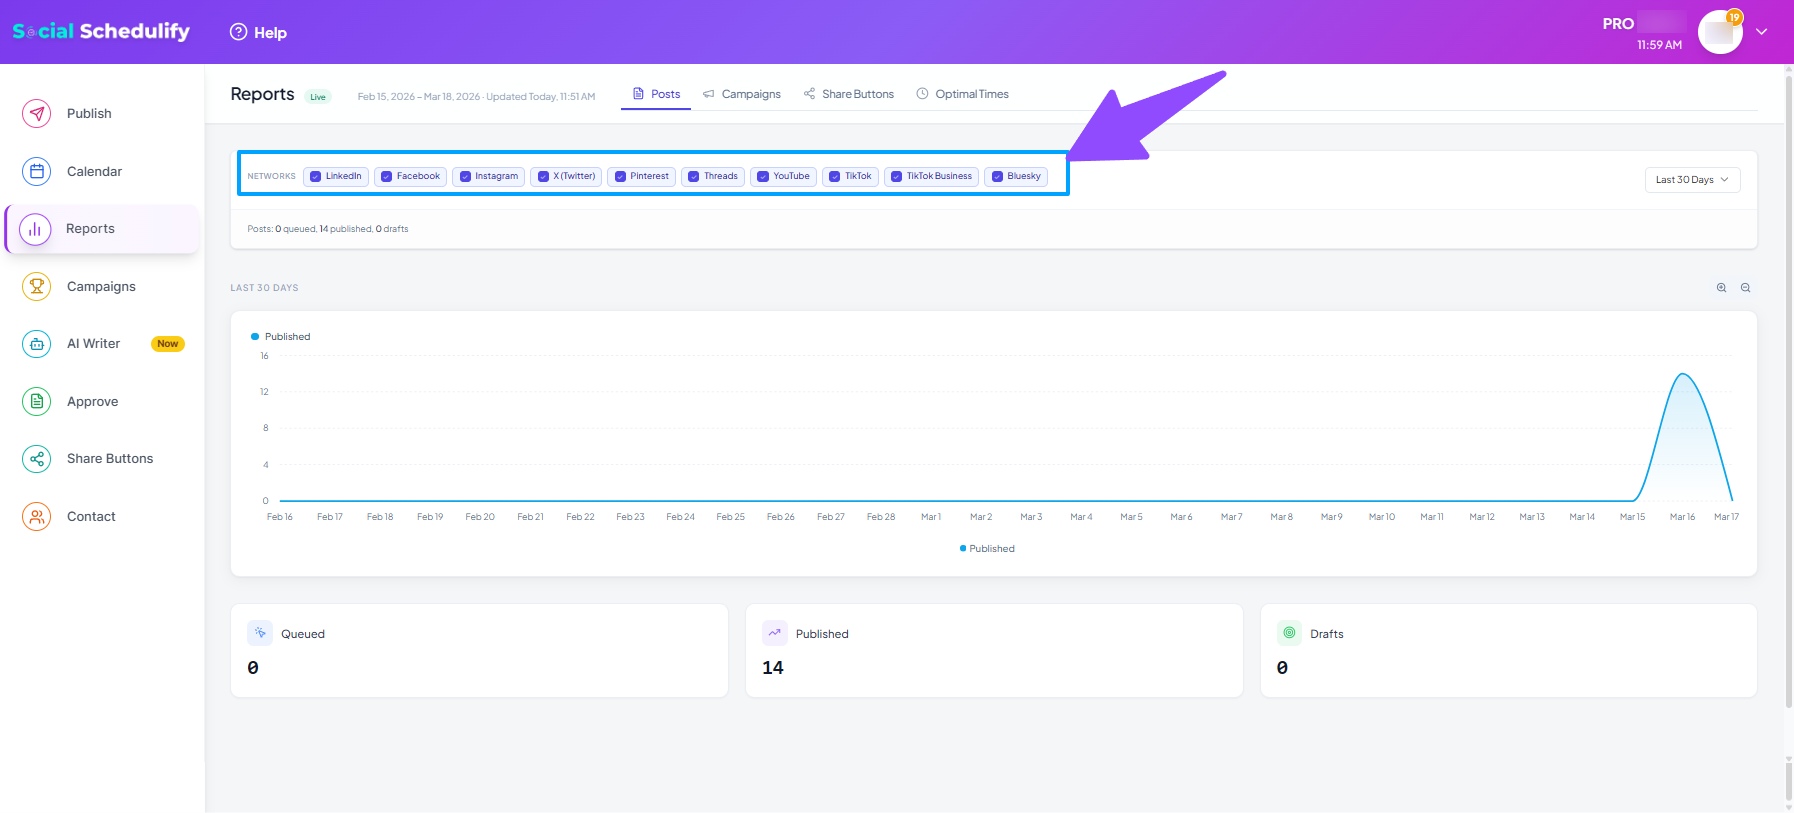
Understanding Your Analytics
The analytics dashboard provides you with valuable insights into your social media performance:
- Engagement metrics (likes, comments, shares)
- Reach and impressions
- Click-through rates
- Best posting times
- Top performing content
- Audience demographics
Exporting Reports
You can export your campaign reports in various formats for further analysis or to share with your team:
- Navigate to the Campaign History section
- Select the date range for the report
- Choose your preferred export format (PDF, CSV, or Excel)
- Click the Export button
Post Approval
Review, approve, or reject posts before they are shared with your audience. You can also edit and reschedule posts in this section. All posts awaiting approval will appear here.
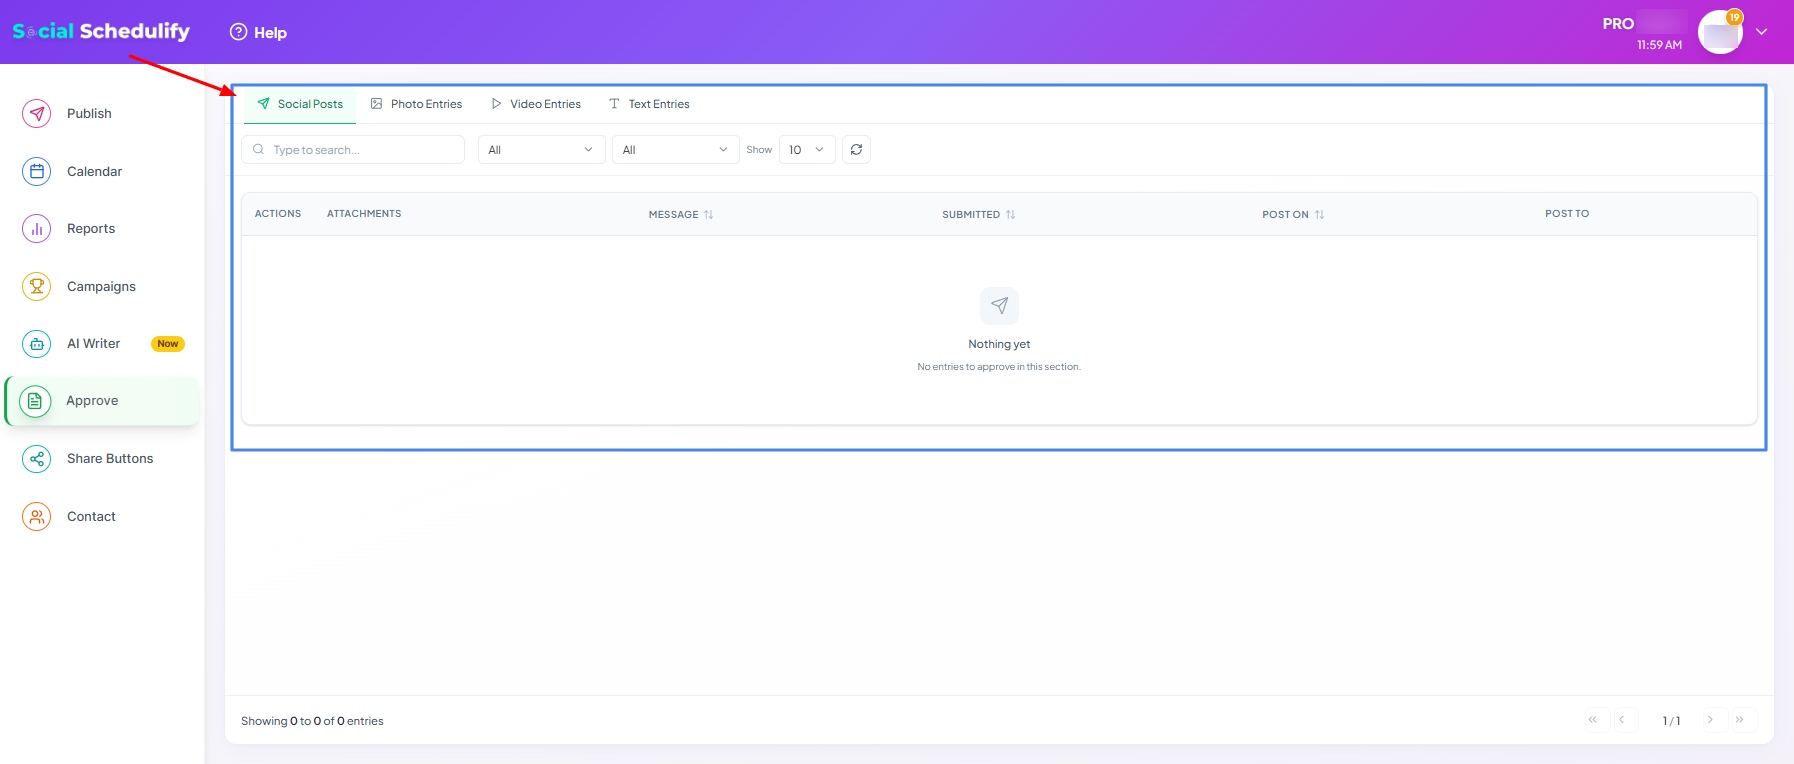
Approving Posts
To approve a post:
- Navigate to the Post Approval section
- Review the content of the post
- Check the scheduled posting time and platforms
- Click the Approve button to confirm
Rejecting Posts
If you need to reject a post:
- Select the post you want to reject
- Click the Reject button
- Add a reason for rejection (optional but recommended)
- Confirm your decision
Editing Posts
To make changes to a post before approval:
- Click on the post you want to edit
- Make the necessary changes to text, images, or scheduling
- Save your changes
- The post will return to the approval queue
Share Buttons and Customization
Customize and set up share buttons for each campaign. Choose the social media platforms you want to share your posts on and track the reach of your shared content.
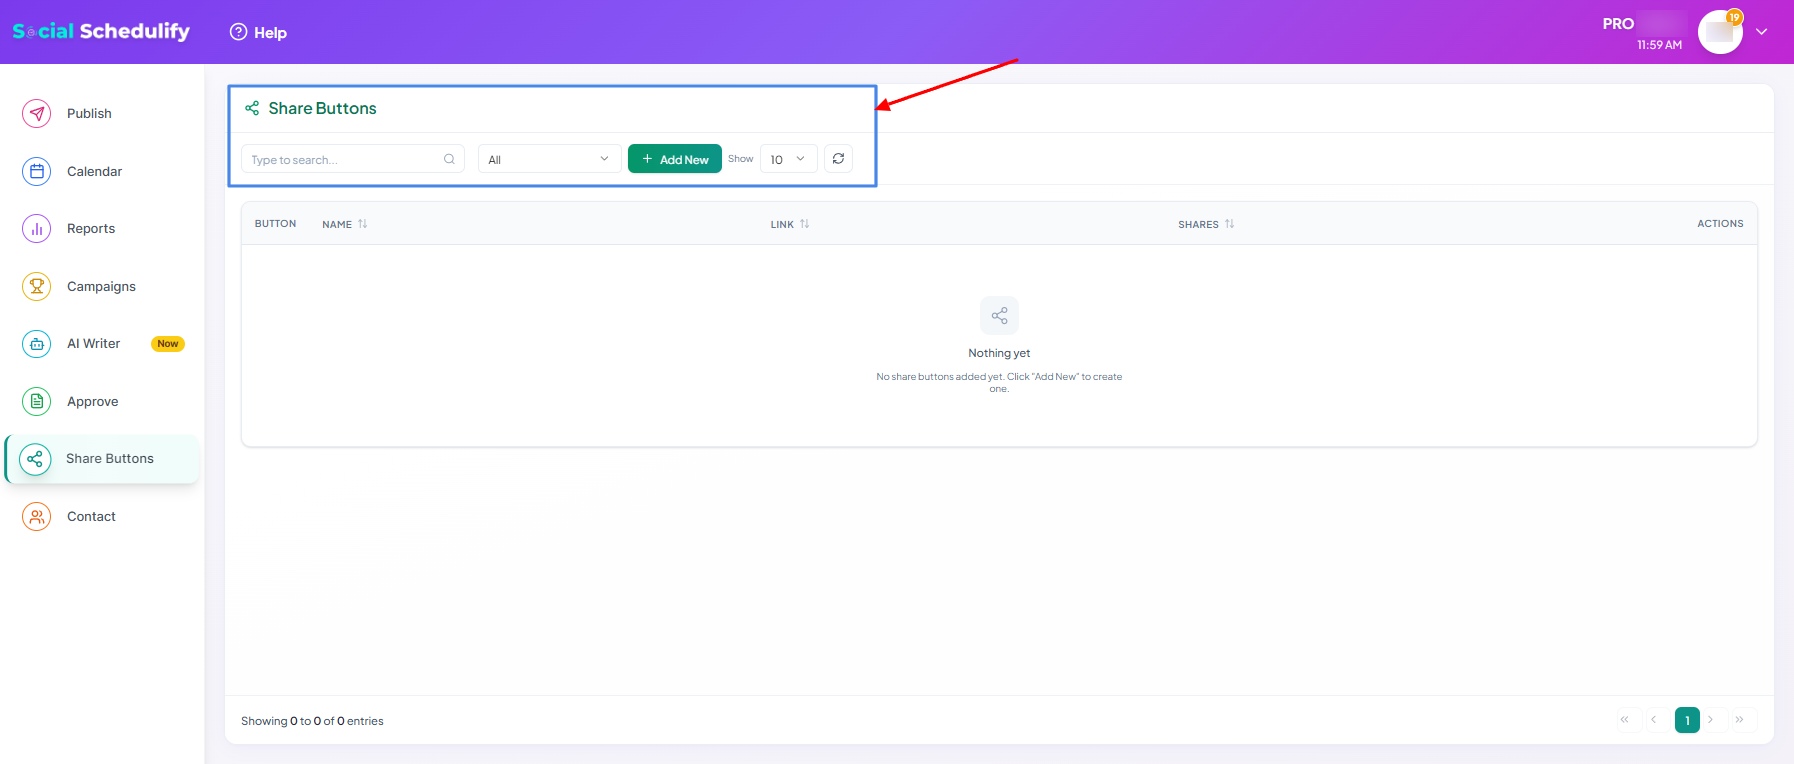
Customizing Share Buttons
To customize your share buttons:
- Navigate to the Share Buttons section
- Select the campaign you want to customize
- Choose which social media platforms to include
- Customize the appearance of the buttons (size, style, color)
- Configure the sharing text and hashtags
- Save your settings
Tracking Share Performance
Monitor how your content is being shared:
- View total shares for each post
- Track which platforms generate the most shares
- Analyze the correlation between shares and engagement
- Identify your most shareable content
Embedding Share Buttons
You can embed share buttons on your website:
- Generate the embed code from the Share Buttons section
- Copy the code
- Paste it into your website's HTML
- The buttons will appear and connect to your SocialSchedulify account
Managing Saved Contacts
Easily save and access your contacts for outreach, collaboration, or other communication needs. All saved contacts are listed and can be edited directly from the dashboard.
Adding New Contacts
To add a new contact:
- Navigate to the Saved Contacts section
- Click the "Add New Contact" button
- Fill in the contact details:
- Name
- Email address
- Phone number (optional)
- Social media profiles (optional)
- Notes or tags
- Save the contact
Editing Contacts
To update a contact's information:
- Find the contact in your Saved Contacts list
- Click the Edit button next to their name
- Make the necessary changes
- Save your updates
Organizing with Tags
Use tags to organize your contacts:
- Create tags for different categories (e.g., "Influencers", "Partners", "Clients")
- Apply multiple tags to a single contact
- Filter contacts by tags to find specific groups
- Use tags for targeted outreach campaigns
Contact Outreach
Use your saved contacts for outreach:
- Select one or more contacts from your list
- Choose the "Send Message" option
- Compose your message or select a template
- Send directly through SocialSchedulify or export for external use